In this section We will learn to create a spring boot hello world rest api based application just by following 5 simple steps.
Here we GO !
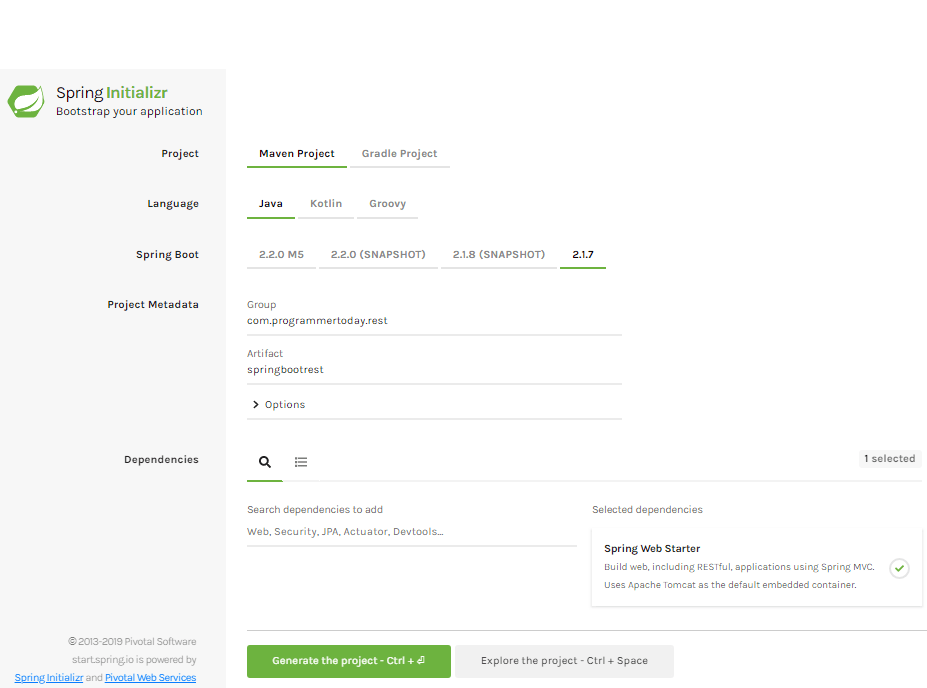
Step 1 : Open Spring Initializr
Open Spring Initializr and create a spring boot rest project like below snapshot. Add the REST dependency and generate the project.
Add maven dependencies, These are the two dependencies which gets added on generating the above project.
<dependencies>
- <dependency>
    <groupId>org.springframework.boot</groupId>
    <artifactId>spring-boot-starter-web</artifactId>
  </dependency>
- <dependency>
    <groupId>org.springframework.boot</groupId>
    <artifactId>spring-boot-starter-test</artifactId>
    <scope>test</scope>
  </dependency>
</dependencies>
Spring Boot REST Controller – make a REST controller
- @RestController Annotation used on the controller class.
- @GetMapping & @PostMapping used to declare get and post apis.
- Property consumes & produces used to consume and produce data of different types for example json, xml, html.
Step 2 : Create Get API
Create a class as below, copy and paste the code in you IDE.
import org.springframework.web.bind.annotation.GetMapping;
import org.springframework.web.bind.annotation.RequestBody;
import org.springframework.web.bind.annotation.RequestMapping;
import org.springframework.web.bind.annotation.RestController;

@RestController
@RequestMapping("api")
public class DepartmentController{

	@GetMapping("/hello")
	public String helloWorld() {

		return "Hello World !";

	}

	@GetMapping(path = "/dept", produces = "application/json")
	public Department getDepartment() {

		return new Department("Information Technology", "IT");
	}
}
Step 3 : Create Post API
Create a class as below, copy and paste the code in you IDE.
import org.springframework.web.bind.annotation.PostMapping;
import org.springframework.web.bind.annotation.RequestBody;
import org.springframework.web.bind.annotation.RequestMapping;
import org.springframework.web.bind.annotation.RestController;

@RestController
@RequestMapping("api")
public class DepartmentController{

  @PostMapping(path = "/dept", produces = "application/json",
              consumes = "application/json")
  public String  addDepartment(@RequestBody Department department) {

    return department.getDepCode()+"--"+department.getDepName();

  }
}
Step 4 : main method using @SpringBootApplication
Create a class with main method as below, copy and paste the code in you IDE,
key point here is we are using @SpringBootApplication annotation to notify the framework that this is our main springboot class
package com.programmer.actuator;

import org.springframework.boot.SpringApplication;
import org.springframework.boot.autoconfigure.SpringBootApplication;

@SpringBootApplication
public class SpringbootprojectApplication {

  public static void main(String[] args) {
    SpringApplication.run(SpringbootprojectApplication.class, args);
  }

}
Result
You can download a REST client or create your own and test the GET and POST apis as below.
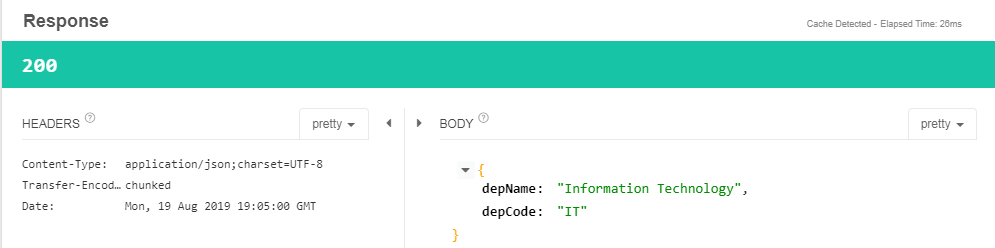
GET API Response – When we hit the GET api see the snapshots below

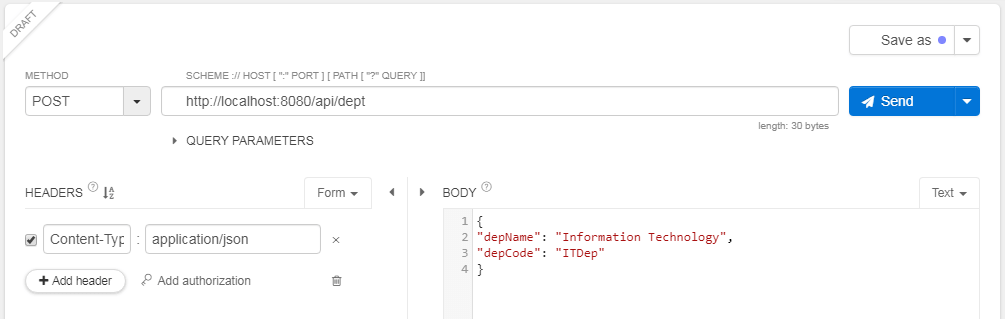
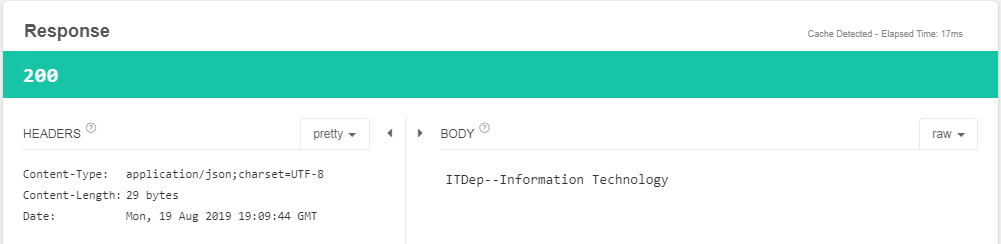
POST API Response – When we hit the POST api see the snapshots below
Summary
In this section we learnt how to create a simple REST based project with SPRING BOOT. Hope you enjoyed it !